Thursday, February 28, 2013

A Few of my Favorites...

 I'm so excited for the update tomorrow!!   I love making Christmas things...but I really think Easter might be my favorite.  I can use colors and flowers to no end!  I really enjoyed working with color this time around...combining colors I never really think...or rather dare to put together.  All the softness and girliness that Easter brings...I just love it!!  I didn't have time to photograph everything tonight, but I wanted to show you some of my favorites....


A little Passover boy (frogs...one of the plagues).

I really love to put two or more figures together and have them interact.  I see these two bunnies as siblings or friends...the larger one confident and bright, and the smaller one who admires and looks up to him (or her).  A bonus:  The egg is a German paper mache candy container that opens up!

This little layered rope basket is really old and I've been saving it for quite some time...the pom pom chick and dyed wheat sprigs came with the basket.  I really love it!!

When I found this 50's or 60's bunny candy container...he was completely yellow...unpainted.  I gave him a custom paint job and his new cotton bunny friend are the brightest of all the pieces!

I really love this guy because he encompasses so many great colors.  And I can almost picture the rest of the spring-time meadow that he was surely plucked from.

And everyone knows I love owls all in a row!  These guys push the envelope in terms of color...especially that yellow guy!

These are just a few pieces...these and all the rest will be available tomorrow morning at 11 am EST, right here on the blog!  See you all then!  :)

Tuesday, February 26, 2013

Easter Update Announcement!

When I took Winnie outside today for a short walk, the snow on the driveway was melting into puddles, the birds were extra chirpy, and the smell of spring was clearly in the air.  Here in the northeast, spring arrives taking the smallest steps it can.  First is the melt...often followed by a back-step of more snow.  Then the animals start showing up.  The bunnies are out more, the squirrels chase each other like crazy and birds who winter elsewhere start to arrive.  Then it's the tiny, short stems that start poking out of the ground, sometimes despite the snow.  After that spring really shows it's head, with the occasional t-shirt weather day, crocuses and daffodils blooming and robins all over the lawn and lots and lots of yard work to do.  I LOVE this time of year.  It's truly the best because while it arrives in the teeniest steps...it dashes away in a hurry in big leaps...disappearing like the white rabbit right into summer.  Sometimes the best things are the most fleeting.  But here to stay are the ways I like to celebrate this precious time of year...Easter goodies!!  With all the color and cheer that a long winter tries to keep away.  Can't wait to show you what's new!!

Blog readers get first dibs as usual and if you'd like to be notified about upcoming blog updates and special events, just sign up for my mailing list on the right side of my blog, or leave a comment with your email address.


New one-of-a-kind pieces will be available for purchase on:
 
Friday, March 1st - Here, the blog - 11:00 am EST

See you here on Friday! :)

Thursday, February 21, 2013

Easter in Progress!

 I'm getting a later start on Easter than I wanted too because my attentions have been elsewhere, but my focus and switched from marble and white to color and festiveness!  Easter is in mid creation here today and I couldn't be more excited!

 Pastel bases:  check!

 Yearly collection of vintage Easter goodness:  check!

 Baskets and bunny tails:  check!

 Color vs. Neutral:  check!

 Pieces that are actually finishedcheck!

Stay tuned for update info!  :)

Wednesday, February 20, 2013

Bathroom Update

The tiling is done! The tiling is done!  I almost never want to see another loose tile ever again!  lol  Well...after tiling two entire bathrooms, I think one can understand why...but things are starting to come together and I am soooo sooo happy and excited that I put all of that hard work in.  The guest bathroom is truly almost done....Ben put the toilet back in yesterday, almost we both feel funny using it just yet, lol.

The sink isn't really actually in, per say, but it is positioned where it will be.  The plumber is coming in on Monday to install the shower fixtures and sinks in both bathrooms.  As you can tell I've already started to bring in accessories...I can't help it!

The washer/dryer is in and has been doing it's job all weekend and week long.  So far so good!  It's beautiful and high tech and it does take a long time to dry the clothes, but so so worth it. 

 I brought these two small vintage medicine cabinets up from the basement...I think I want to hand them on wall near door....we'll see.

 The spigot for the bathtub is very pretty and is waiting patiently for the plumber.

 The other bathroom occupied the majority of my time the past several days....but the tiling is finally done!!  It took me three full days to tile the entire shower...phew!

The walls are a warm white marble that I got from Home Depot for $4 a sf.  They came in 12x12 pieces and I cut each one into long bricks for the sides and bottoms, and into arrow shaped herringbone for the back wall.  It took a while...I think the blade on my saw is a little worse for wear, but so worth it.  The gray marble stripe is actually a shelf to put shampoo and whatnot and matches the threshold.  The shower floor is tiny 1 inch hex tile...very old school.

 Now it just needs the plumbing!

And Ben and I just finished grouting the floor last night.  Phew!  It's hard to see in these photos I think, but the tile is larger hex with the small squares...another classic.  I installed the custom made piece of molding that will go under the sink.  It just needs a paint job now.  And I can't wait to get the sink installed....it's going to look wonderful!  

Phew!  Well now that the hard stuff is done, I'm back in the studio and catching up on all of the things that I've been neglecting...including Easter goodies!  I'm hoping to have an update maybe next week or so.  Stay tuned for that!  :)

Tuesday, February 12, 2013

Bathroom Remodeling!!

 I've been spending little time in the studio for the last week or so for one reason alone....we've been tearing apart both of our upstairs bathrooms!!  The bathrooms were the last major project on our "inside house" list.  We've saved them for last because they require the most work and the most moola.  But it's well worth it and well worth the wait too.  There's still a lot to be done...but so far the guest bathroom/laundry room looks like the photos above.  Below is the before...yelch...

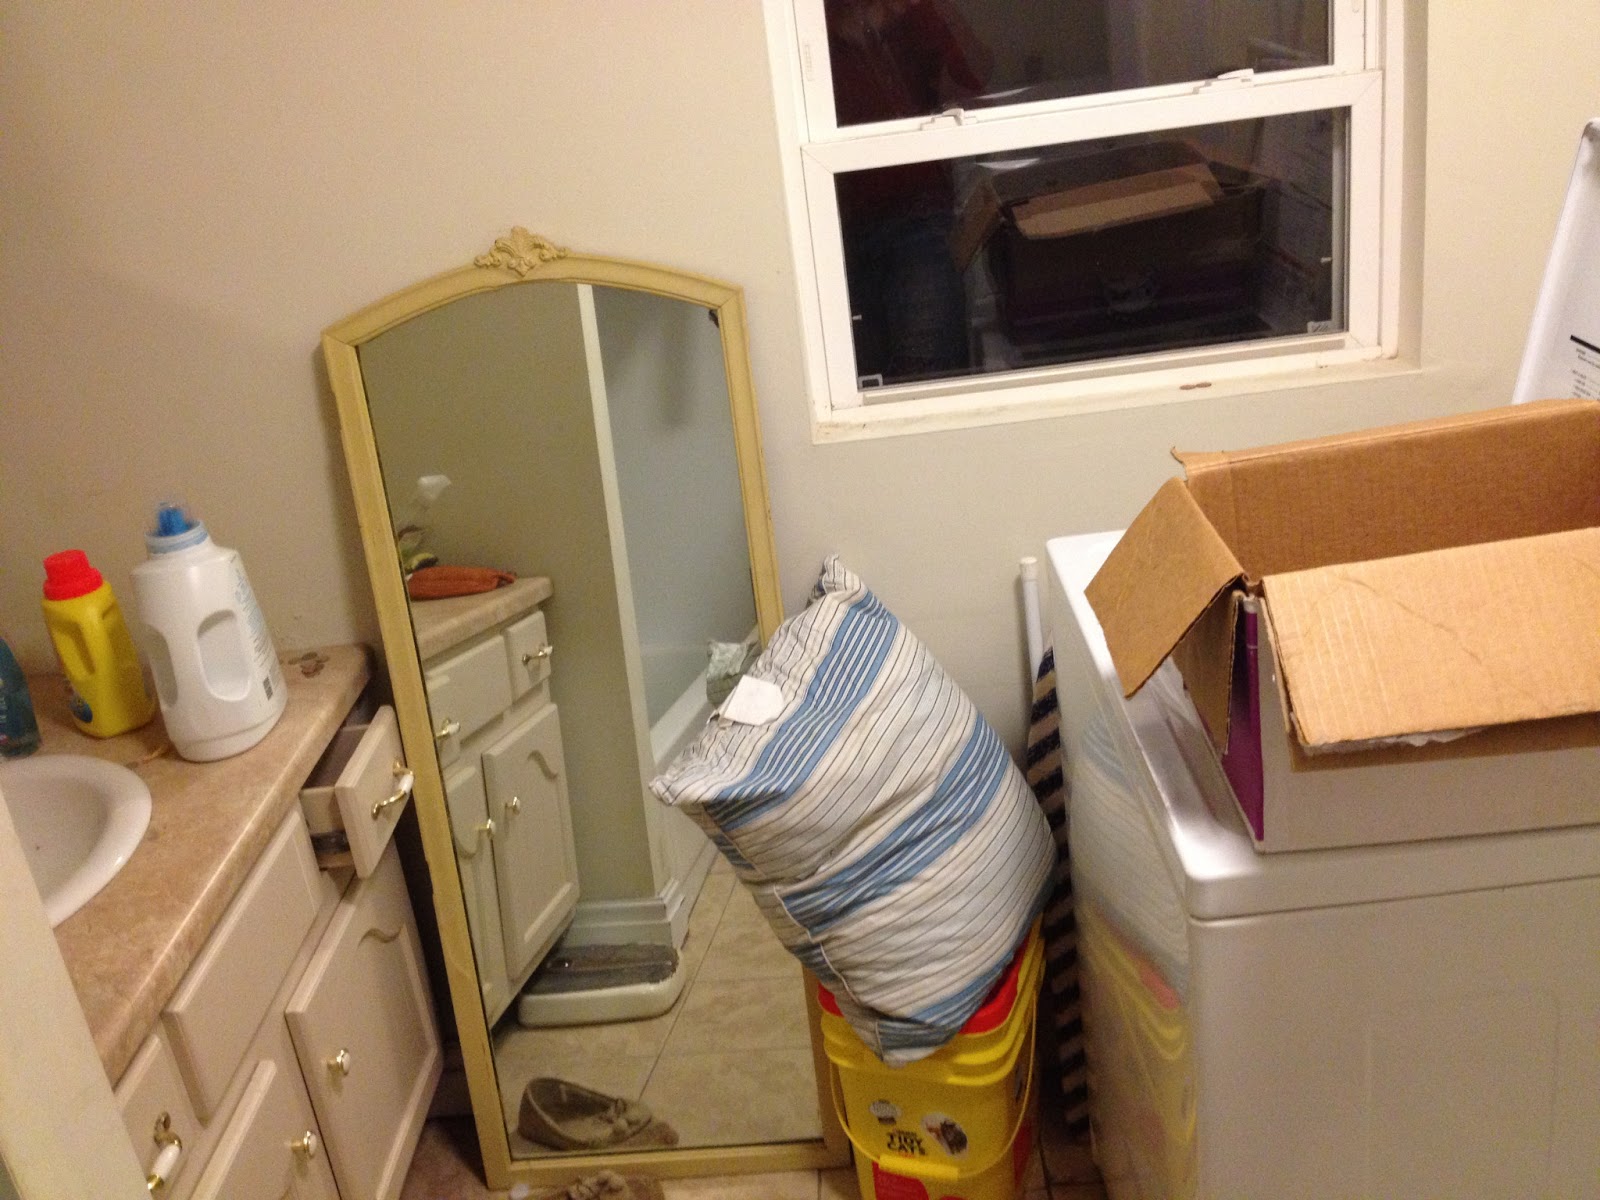
 The before bathroom left soooooooo much to be desired.  The shower walls were plan and was coming apart at the seams...the shower head bobbed in and out of the wall, the sink leaked underneath so we couldn't use it without a puddle forming on the floor, and the hookups behind the washer and dryer were so far out from the wall...the appliances were taking up far more room than they needed too.  And mind you this bathroom was renovated right before we bought the house in 2008.  The floor was ugly ceramic tile with a printed pattern meant to hide dirt, which to me just made it look like it was already dirty.  The toilet was old and bisque colored...

 The sink was blah and boring and had all sorts of weird holes in the bottom of the cabinet, so whatever you stored in there had the distinct chance of falling through and possibly never being seen again.  Needless to say that when I took the sink out, I found all sorts of icky things that my old tenants lost under there. 

 This bathroom isn't teeny tiny, but it looked and felt that way.  And I hated going in it, so I didn't and we let it get junky because it was never going to look pretty all cleaned up anyway. 

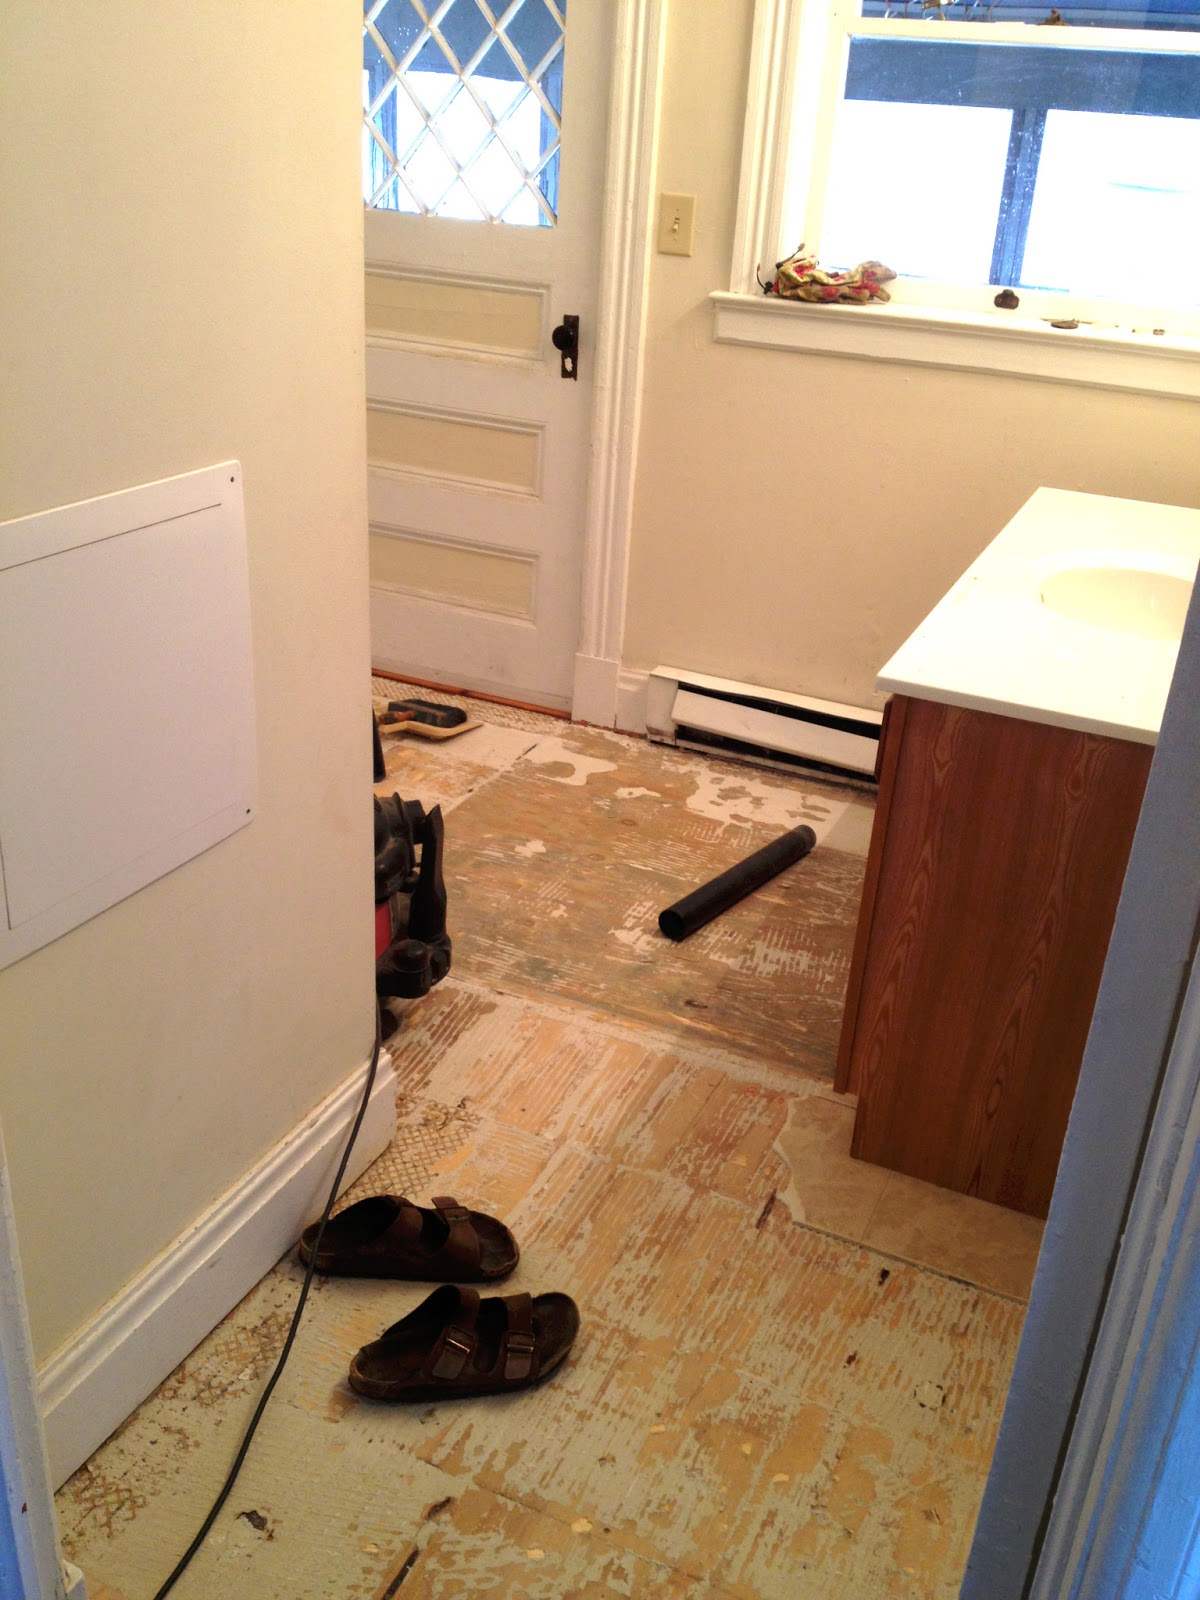
 Once I knew our scheduling for redoing the bathrooms, I didn't waste any time ripping stuff up.  These 12x12 tiles came up with very little effort. 

 I took the sink out and wasn't sure what the floor would look like underneath.  Part of the floor was missing and there was an awkward heating vent right near the water hookups.  I wound up piece-mealing old scraps of wood to finish off the floor and bought a pretty scrolling vent cover for the opening of the heat vent.  The original molding is missing there too and since it was handmade a long long time ago and neither Lowe's or Home Depot carries anything like it, I'm getting a piece handmade to match by a molding maker here in town...a lucky accident that I found him through his wife who works at the Curtis Lumber down the street.

I also installed all of the bead board and upper molding yesterday. 

  It took me a couple of hours to cut the tile to fit around the pipes and vent, but well worth it.  We are putting a pedestal sink there with a small base, plus in case we ever want to put an exposed console sink or something there in the long distant future, the tile won't be a problem.

 I hired a plumber here in town to demo the shower walls and install cement board and the fixtures.  Glad I didn't have to do that part!

This corner is where the washing machine was.  The dryer hookups are on the other side.  We were going to have the dryer hookups reinstalled on this side and get stackables to save on floor space, sacrificing most of the window.  This is until I discovered the 2 in 1 washer/dryer combo from LG.  It's one machine that washes, and then dries your clothes!  You don't need to switch the clothes and if you wanted to just wash, or just dry, you can.  It's more popular in Europe, and really hasn't caught on here the US yet.  It's ventless so it doesn't need a dryer vent.  It used condensation to dry your clothes (don't ask me how it works!).  It does take longer to dry, but we leave our clothes in there for hours after it buzzes anyway.  And since it doesn't use hot air, it's more energy efficient and used a regular outlet plug instead of a giant weird looking one that most dryers need.  It was perfect for us and saved us a lot of money in labor!  And best of all...Our window won't be blocked and we can build some shelves over top of it.  It's supposed to be delivered today!  Can't wait until we can start using it!

 So anyway...back to the rest of the bathroom...here it is as of this morning!  I tiled the entire shower walls with marble subway tile on Saturday (phew...it took me til midnight!).  And yesterday installed the bead board and most of the arabesque tile floor.

 Onto the other bathroom...our master bathroom that opens onto the balcony.  This is the before.  Yuck...boring, ugly, yuck.  The shower head in this bathroom also bobbed back and forth in the wall and sprayed everywhere, so the dry wall above the shower insert was melting away, slowly but surely.  I could tell that wall used to be bright blue...lol. 

 The floors were the same ugly floors as the other bathroom, but with a "fancy" mosaic tile border.  The vanity was new and nice to most maybe...but ugly and boring to me.  I'm not really an orange-y wood type of gal.  I can't wait to show you the sink that we're replacing it with...hint...it's part vintage enamel and part barn board.

 Since we're doing both bathrooms at once (we have a bathroom downstairs, so we weren't bathroom-less), I started chipping away at this tile.  It was a little more difficult to pull up, but not too bad.  And Ben helped a bit. 

 No tile...yay!

 We took the sink and toilet out and I hired some other guys to demo the shower...here it is post demo and semi-rebuilt.

 Here's what it looks like right now.  We decided that since we almost never take baths, that we would change this to a walk-in shower with glass doors.  They finished up the mudset for the floor and the rest of the walls yesterday and I can start tiling at any time now.  I'm looking forward to the result, but kind of dreading the process...only because it takes a really long time.  I'll set aside two days just for the shower.  The floor should go a little faster. 

I can't wait to show you when it's all done!!!  :)

Monday, February 4, 2013

New Website!

I have a new website!  Sort of...

Every couple of years I get severe ants in my pants to give my website an overhaul.  Over time I get bad at updating it, keeping it fresh and not letting it get stale.  Real bad.  Soooo, one of my New Years resolutions was to update my website....  It was last year's New Years resolution, lol. 

Well...a year later, I did it and my new and improved website looks very similar to the old one and has many of the same features, but has more helpful information, more interesting information (like the press page) and most important...new photos! 

The outdated for sale page turned into the gallery section and I have tons of new photos of my work in almost every category, and photos of other inspiring things as well.  Photos are the most fun!

I would LOVE to know what you think about my updated website!!  Is it pretty?  Am I missing anything?  Is something confusing or hard to find?  Please comment and let me know what you think!  :)